How To Convert JSON Object To / From Java
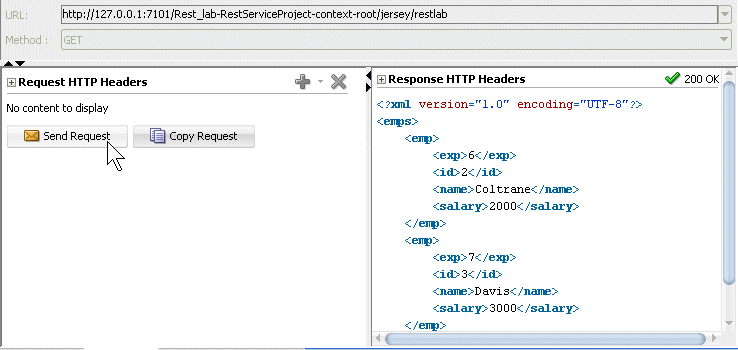
ADF does not support REST WebService with JSON Object as response, it supports only XML as Response.
Jackson is a High-performance JSON processor Java library. In this tutorial, we show you how to use Jackson’s data binding to convert Java object to / from JSON.
For object/json conversion, you need to know following two methods :
//1. Convert Java object to JSON format
ObjectMapper mapper = new ObjectMapper();
mapper.writeValue(new File("c:\\user.json"), user);
//2. Convert JSON to Java object
ObjectMapper mapper = new ObjectMapper();
User user = mapper.readValue(new File("c:\\user.json"), User.class);
Note
Both
Both
writeValue() and readValue() has many overloaded methods to support different type of inputs and outputs. Make sure check it out.1. Jackson Dependency
Jackson contains 6 separate jars for different purpose, check here. In this case, you only need “jackson-mapper-asl” to handle the conversion, just declares following dependency in your
pom.xmlcodehaus
For non-maven user, just get the Jackson library here.
2. POJO
An user object, initialized with some values. Later use Jackson to convert this object to / from JSON.
package com.mkyong.core;

import java.util.ArrayList;
import java.util.List;

public class User {

 private int age = 29;
 private String name = "mkyong";
 private List<String> messages = new ArrayList<String>() {
  {
   add("msg 1");
   add("msg 2");
   add("msg 3");
  }
 };

 //getter and setter methods

 @Override
 public String toString() {
  return "User [age=" + age + ", name=" + name + ", " +
    "messages=" + messages + "]";
 }
}
3. Java Object to JSON
Convert an “user” object into JSON formatted string, and save it into a file “user.json“.
package com.mkyong.core;

import java.io.File;
import java.io.IOException;
import org.codehaus.jackson.JsonGenerationException;
import org.codehaus.jackson.map.JsonMappingException;
import org.codehaus.jackson.map.ObjectMapper;

public class JacksonExample {
    public static void main(String[] args) {

 User user = new User();
 ObjectMapper mapper = new ObjectMapper();

 try {

  // convert user object to json string, and save to a file
  mapper.writeValue(new File("c:\\user.json"), user);

  // display to console
  System.out.println(mapper.writeValueAsString(user));

 } catch (JsonGenerationException e) {

  e.printStackTrace();

 } catch (JsonMappingException e) {

  e.printStackTrace();

 } catch (IOException e) {

  e.printStackTrace();

 }

  }

}
Output
{"age":29,"messages":["msg 1","msg 2","msg 3"],"name":"mkyong"}
Note
Above JSON output is hard to read. You can enhance it by enable the pretty print feature.
Above JSON output is hard to read. You can enhance it by enable the pretty print feature.
4. JSON to Java Object
Read JSON string from file “user.json“, and convert it back to Java object.
package com.mkyong.core;

import java.io.File;
import java.io.IOException;
import org.codehaus.jackson.JsonGenerationException;
import org.codehaus.jackson.map.JsonMappingException;
import org.codehaus.jackson.map.ObjectMapper;

public class JacksonExample {
    public static void main(String[] args) {

 ObjectMapper mapper = new ObjectMapper();

 try {

  // read from file, convert it to user class
  User user = mapper.readValue(new File("c:\\user.json"), User.class);

  // display to console
  System.out.println(user);

 } catch (JsonGenerationException e) {

  e.printStackTrace();

 } catch (JsonMappingException e) {

  e.printStackTrace();

 } catch (IOException e) {

  e.printStackTrace();

 }

  }

}
User [age=29, name=mkyong, messages=[msg 1, msg 2, msg 3]]


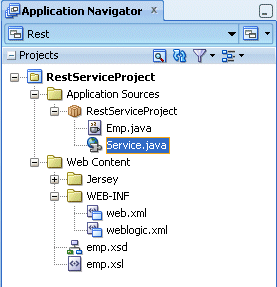


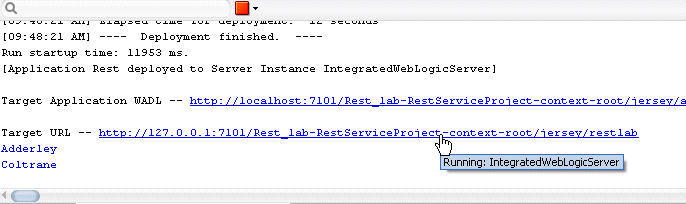
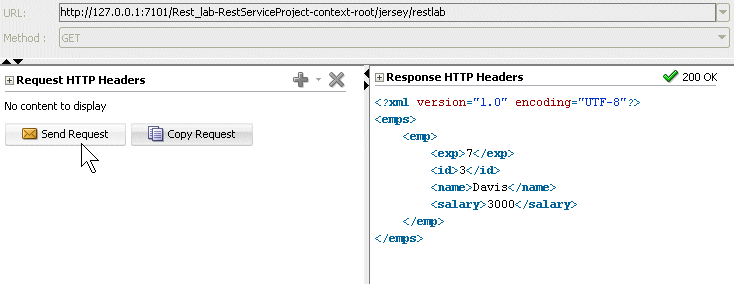
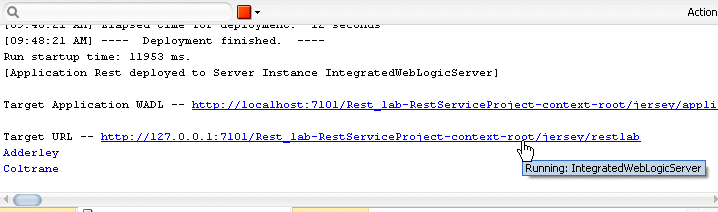
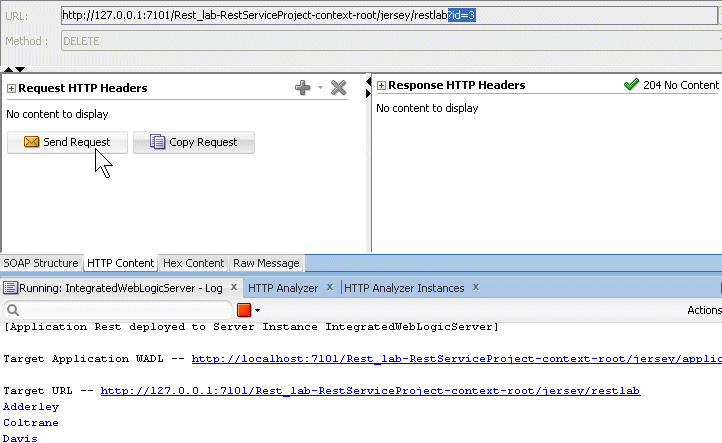

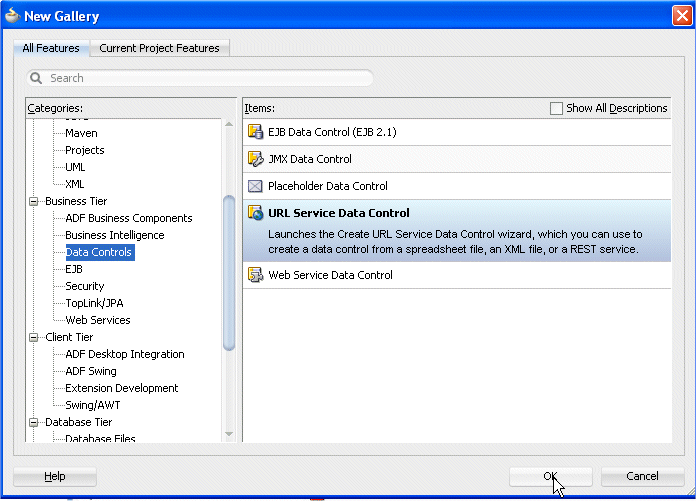
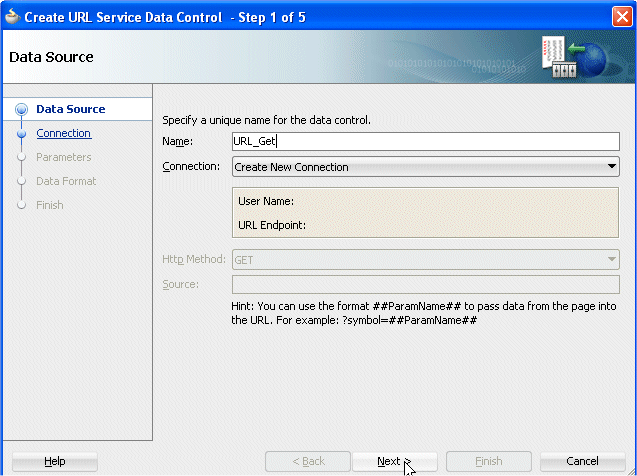
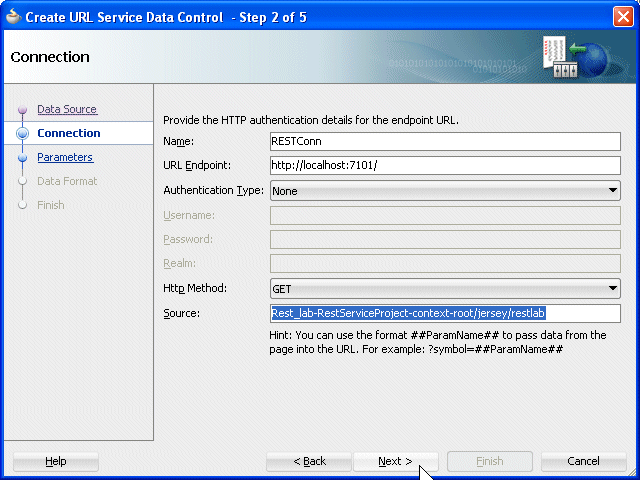
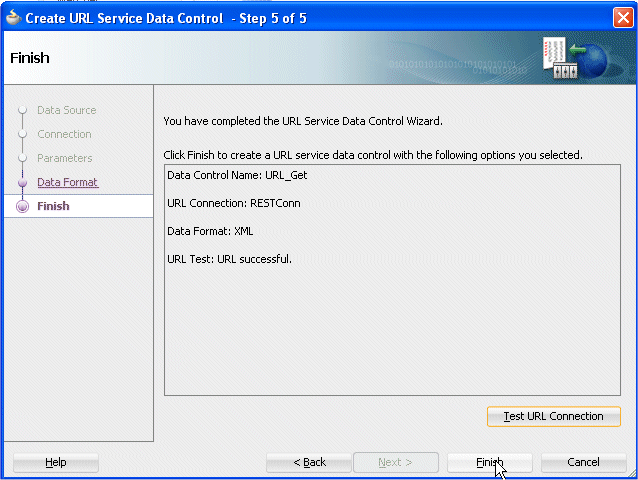
 Rest
Rest